BootLoader
7. Bootloader
One of the new features that is offered with the FFT Gyro 4.0, is the firmware update option that allows tu user to keep updated the system with new firmware releases. To consult new versions, please visit the official website and git repository, in which you will find the most current HEX file, which is used to update the main board.
7.1 Get Ready
7.1.1 Download the PIC32 bootloader application tool to upload the HEX file
-
You will also need the PIC32 bootloader application tool which is going to be used to upload the previous HEX file, and which you can download in the next link:
7.1.2 Download the HEX file
-
You can download the HEX file with the new firmware in the next link:
7.2 Enter Boot Mode
- Connect the USB cable between the FFT Gyro and the PC.
- With the help of a pencil or pen, press the push button located at the front panel of the FFT Gyro 4.0, in which the switch, the LEDs and the USB port is located. You can identify a hole in the front panel in which a push button is a bit hidden inside. Keep pressed for 3 seconds and you will see how the operation and status LEDs change its behaviour,and start blinking in sequence of 2-by-2.
Power LED Operation LED (One) Operation LED (Two) Operation LED (Three) Status LED
7.3 Upload the HEX file using the programming tool
7.3.1 Open the PIC32 bootloader application tool and click on the open file option
- Open the bootloader application tool.
- Select the check box Enable located in the USB section.
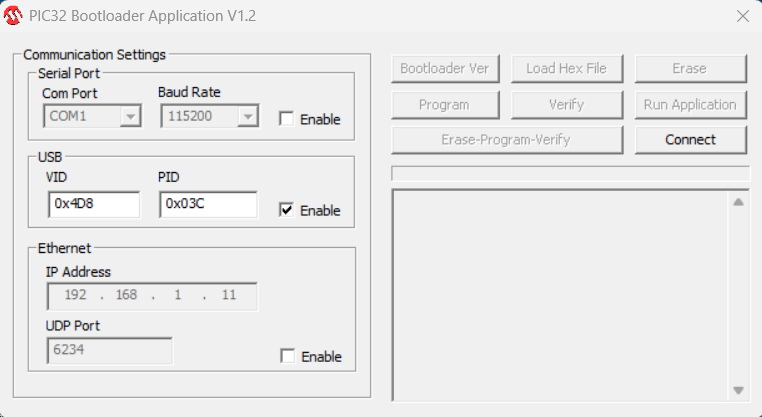
- Click the Connect button on the right section.
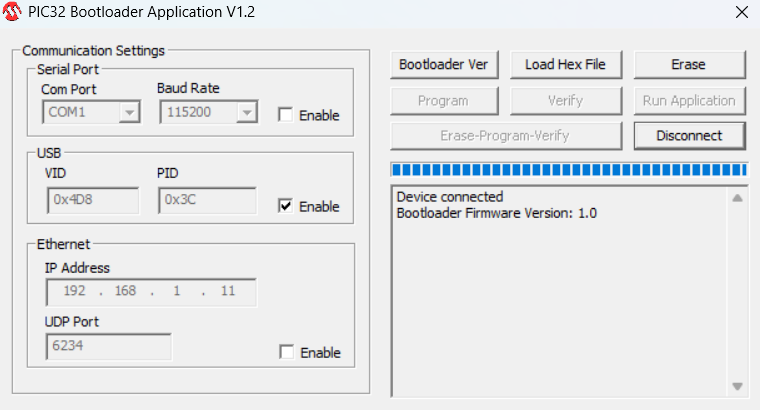
- You should see some messages stating the Device Connected. You can also see some of the other buttons are now available.
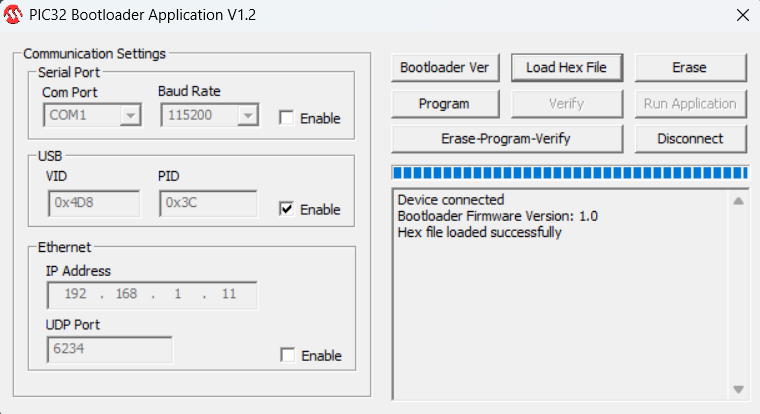
- Click the button Load Hex File and this will open a window allowing you to locate the HEX file. Once loaded, a message should be displayed saying Hex file loaded successfully.
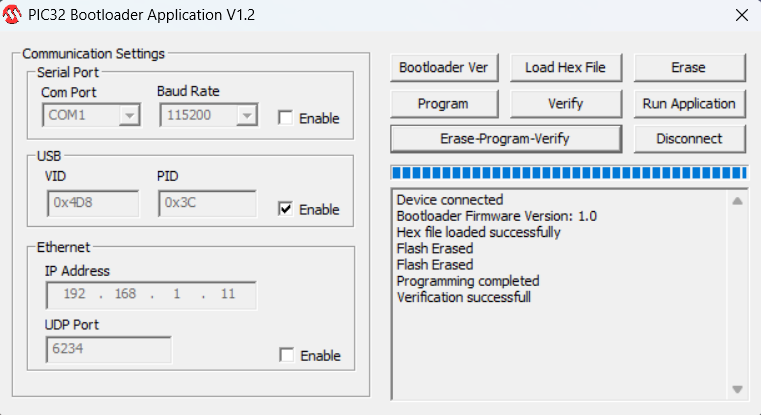
- Once the file was selected, now press the Erase-Program-Verify button, to upload the firmware. You should see a message in the little message box below, and if everything went well, the message should say something like the next image:
7.4 Reset the System
- Turn off and turn on the system using the switch located at the front panel once you have done the previous instructions. Now the system is updated and you can keep developing!